Introduction
In this article you will be shown how to authorise a device as well as be shown how
the autologin feature works for a device.
How to Implement
When you either scan the customer QR code or enter a valid provision reference, the device
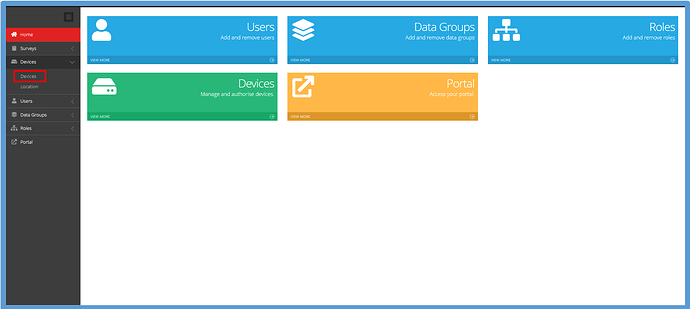
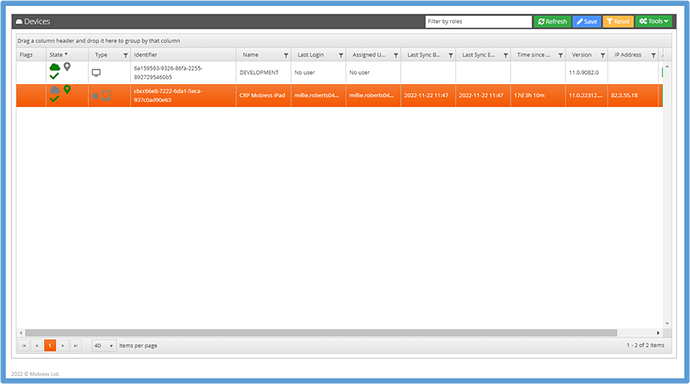
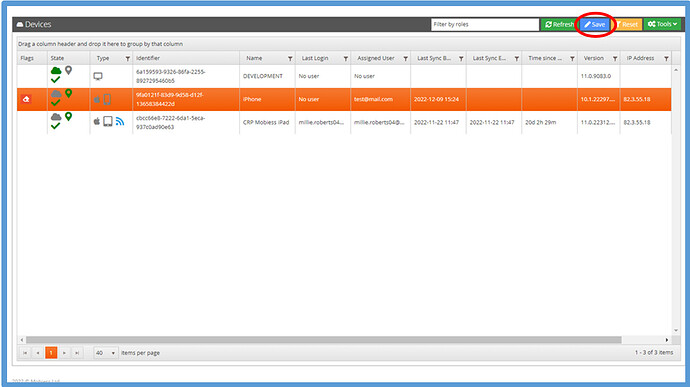
will need to be authorised. Navigate to the Devices tab, where a list of all connected devices will be shown.
Select the row of the device you wish to authorise, ensuring that the device identifiers match on the portal and on the device. The row should highlight orange.
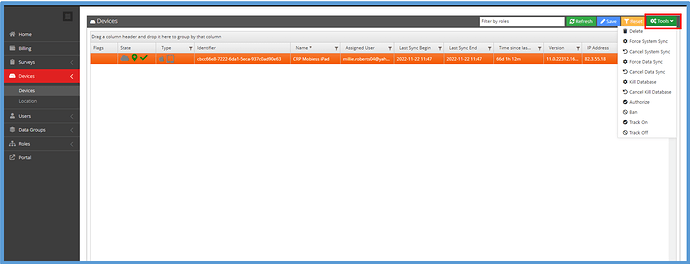
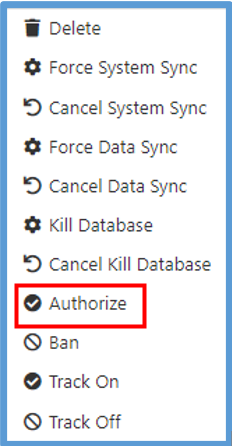
Click the green Tools button in the top right of the Devices box. A dropdown containing all options for that device should be shown.
To authorise the device, click the “Authorise” button within the dropdown.
Now, when the user clicks “Yes” to retry on the unauthorised popup on their device, their device will be fully provisioned and will start to download Mobiess data.
How to Implement Assigned Users/Auto Login
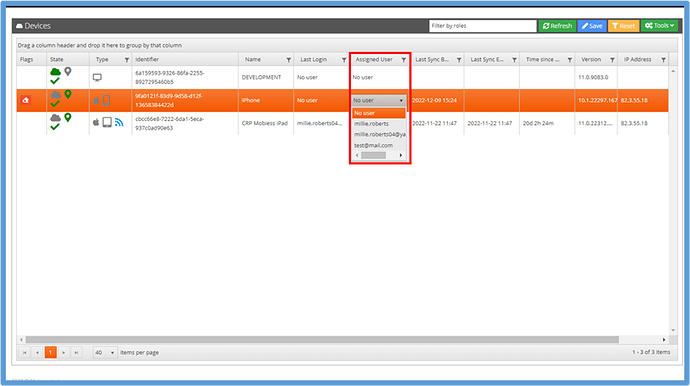
Assigning a user to a device means that whenever the Mobiess app is accessed on that device, it automatically logs in to the assigned user’s account, so there is no need to re-login every time the user wants to access the app. To implement this feature, on the row of the device you want to assign a user to, click the Assigned User column. You will be shown a drop-down list of all users that can be assigned.
Select a user from the drop-down list. Next, you must click the blue Save button at the top right of the box, otherwise your changes will not be saved. Click Reset and your selected user will appear in the Assigned User column.
Next time the Mobiess app is accessed on this device, the user will automatically be logged in as that account.
