Introduction
As an Insight customer, you will have access to Survey Templates, as well as the Survey Template Designer. There are many informative Knowledge Articles across the Mobiess Discourse in order to help you navigate the survey designer, as well as other Insight features. In this article, I will be explaining top five tips that will make the creation of your surveys much more streamlined, as well as saving you time.
Tip Number One: Use Custom Library Templates
When you edit a survey template, there are some instances where you may need to put the same question, with the same configuration, multiple times. To save time when doing this, it is possible to put the question template into your Custom Library.
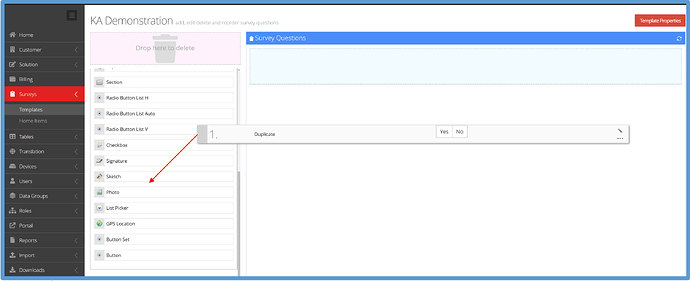
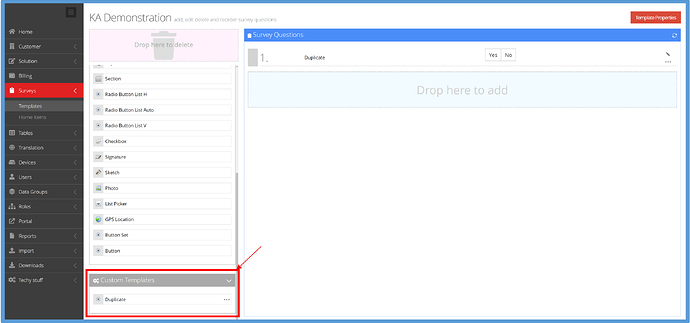
To do this, hold down on the question, and then drag and drop it into the box at the bottom of the questions selection within the template editor, labelled “Custom Templates”.
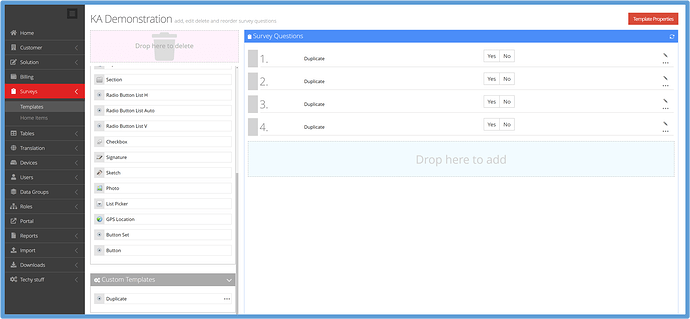
The question template is now available to be used as many times as needed, across all of your survey templates.
Tip Number Two: Use Labelling to Separate Your Questions
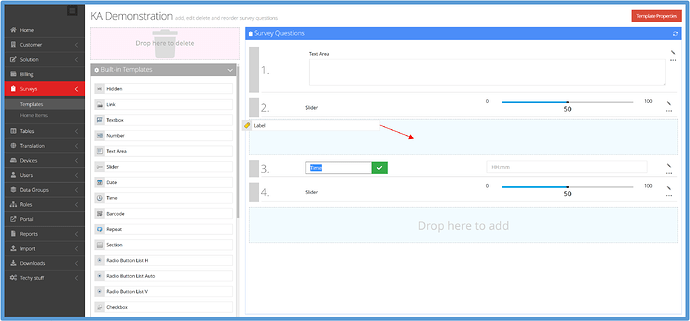
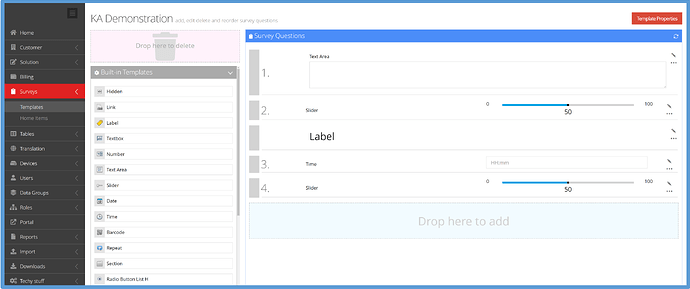
When separating your questions within a template, labels can be used in place of section dividers.
To use a label to separate questions, simply drag and drop the label type template from the question selection.
Tip Number Three: Scoring
Scoring can be used for a multitude of reasons. For example, if your organisation offers a pass/fail system for the rating of an asset, scoring can be used to work out whether or not an asset passes or fails inspection. This saves users from having to manually calculate scores themselves.
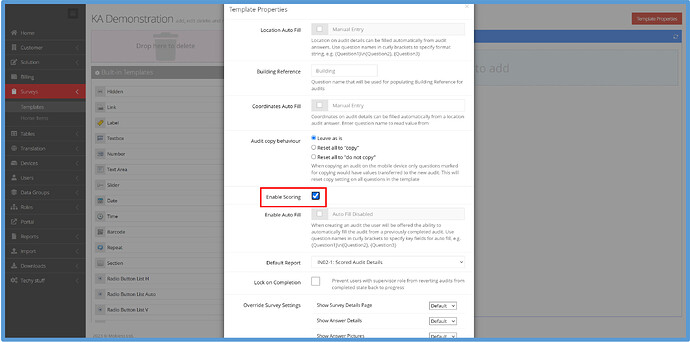
To use scoring within your surveys, firstly you must enable scoring within your Template Properties. To do this, click on the red “Template Properties” button at the top of the template, and tick the box to enable scoring.
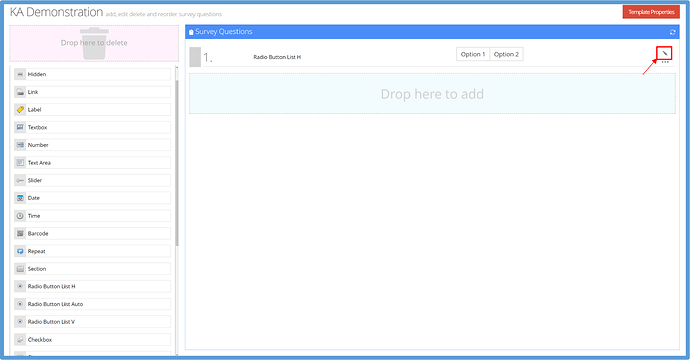
Next, you need questions that hold values. For this example, I will be using radio buttons. Drag and drop your question over to the Survey Questions section, then click the grey pencil to edit it.
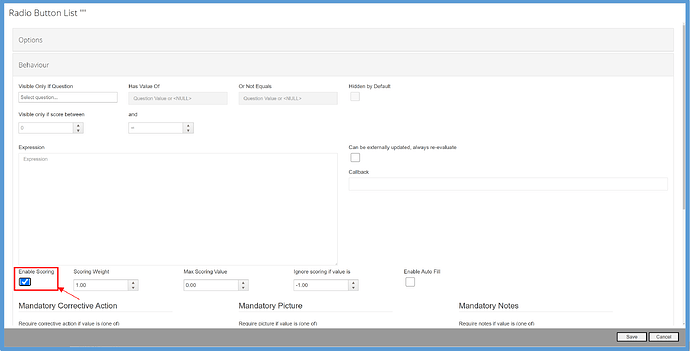
In the question editing screen, click on the behaviour tab, and click “Enable Scoring” on the question.
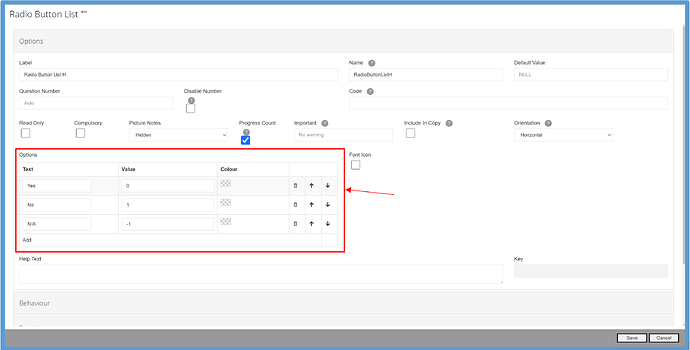
Next, we need to add values to each possible response to the question. If your question has Yes/No/NA answers, a general rule-of-thumb is to give Yes a value of 0, No a value of 1 and N/A a value of -1.
Scores have now been added to your survey. For more information on implementing scoring, click here.
Tip Number Four: Using data driven picklists
Data driven picklists draw data from a selected table and display it in the form of a list picker. This is useful for selection of variables such as building name.
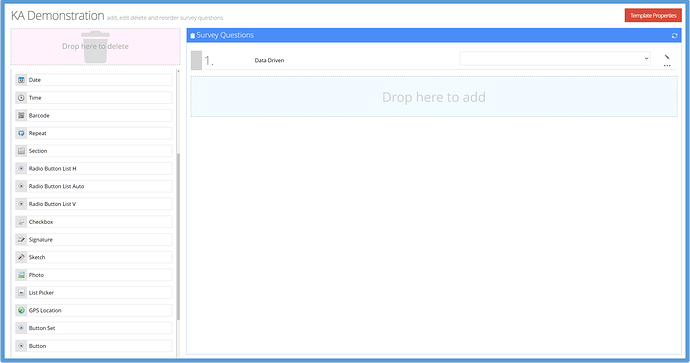
To implement this, firstly you will need to add a list picker into your desired template, by dragging and dropping it from the question templates.
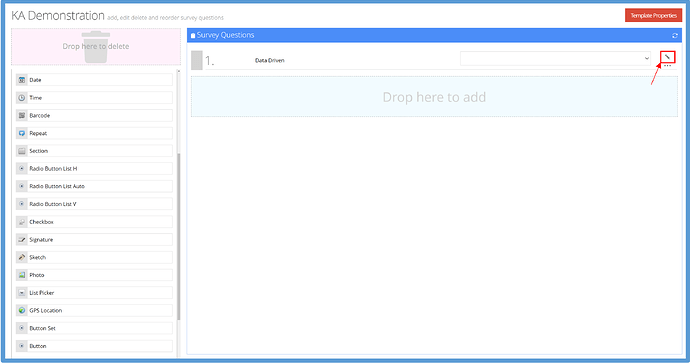
Next you will need to click the grey pencil to the right of the question in order to enter the editing menu.
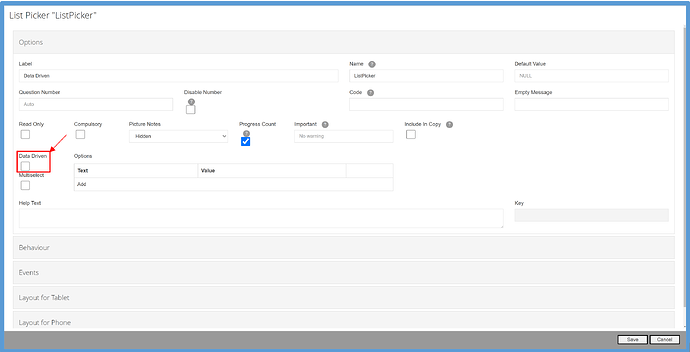
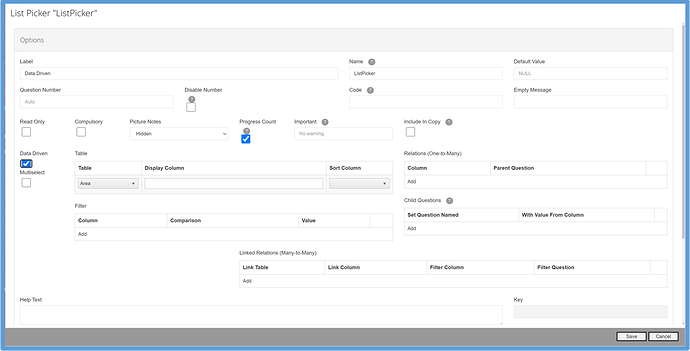
Within the editing menu, under “Options”, tick the “Data Driven” box.
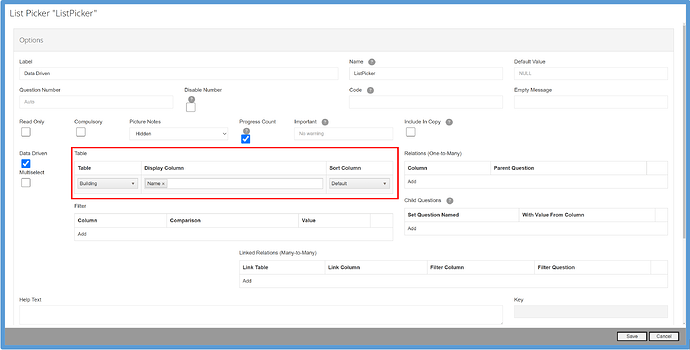
Under the table section, select the table you wish to draw data from, as well as the table column you want to display. There is also the option to sort the column by different parameters.
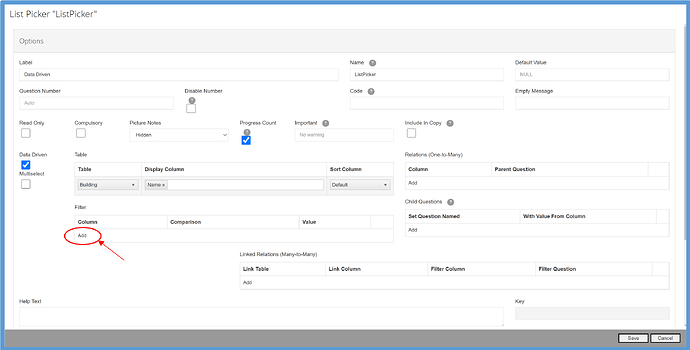
If you don’t want deleted items to appear within your list, click “Add” under the Filter box.
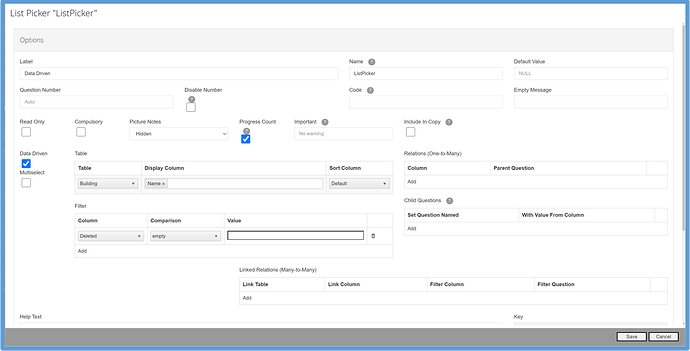
Next, set the Column field in the Filter table to “Deleted”. Then, set the Comparison field to “empty”.
Now, no previously deleted buildings will appear within the picklist.
Tip Number Five: Hidden Script Within a Template
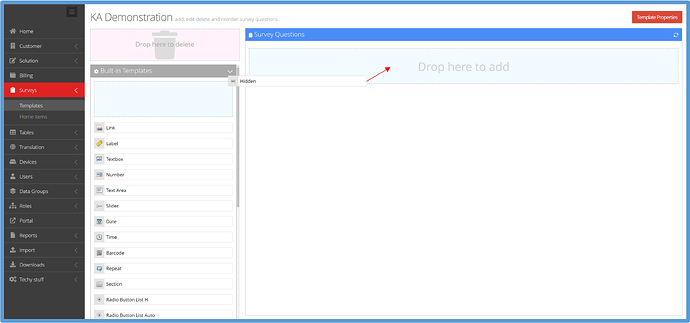
It is possible to hide scripts into your template, to add specialist behaviours into your survey. To do this, firstly, drag the Hidden question type from the templates to the Survey Questions.
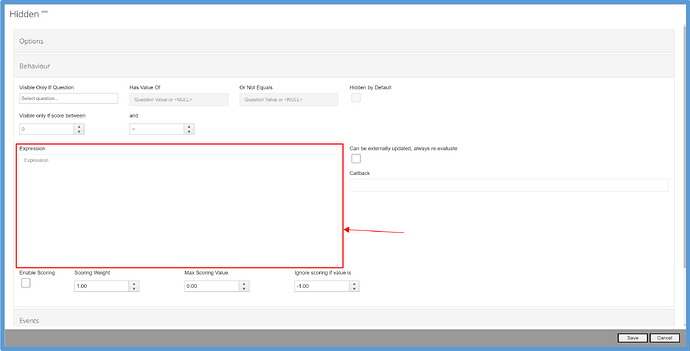
To add script into the question, click onto the Behaviour tab, and write your script into the “Expression” textbox.
