Introduction
The autofill feature can be used to populate Survey data from previously completed audits that have autofill enabled, using a key field to distinguish the sets of data.
How to Implement
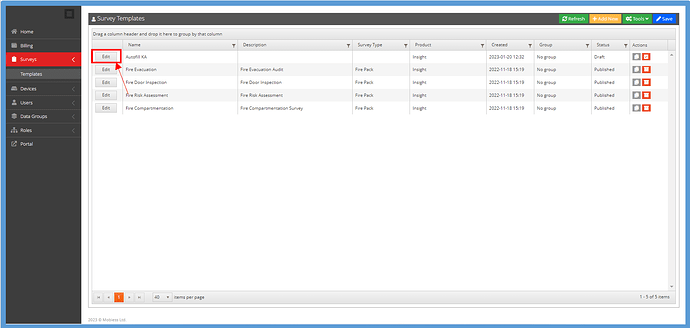
Firstly, find the survey template you wish to allow autofill within in the Survey Templates page, and click the Edit button.
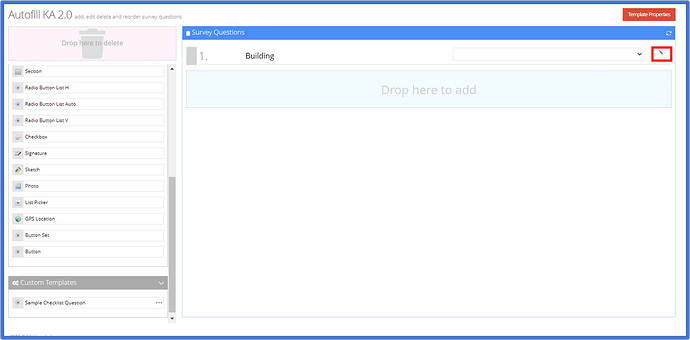
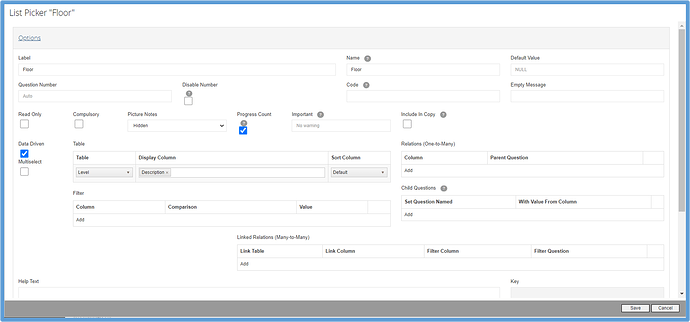
Next, you must choose which field you wish to be a trigger for AutoFill. A data-driven picklist connected to all client buildings should be used as the trigger for the AutoFill feature. To create a data-driven picklist, drag the List Picker from the built-in templates. Give it a name then click the grey pencil sign to the right to edit it.
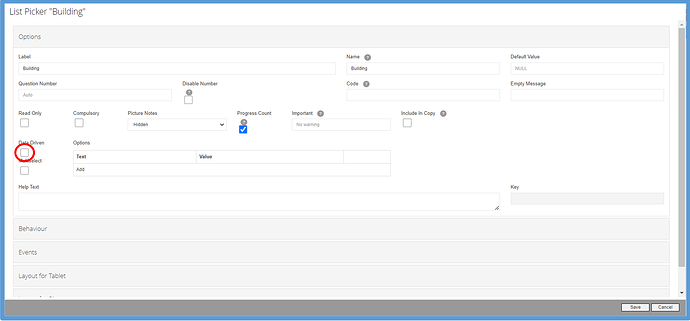
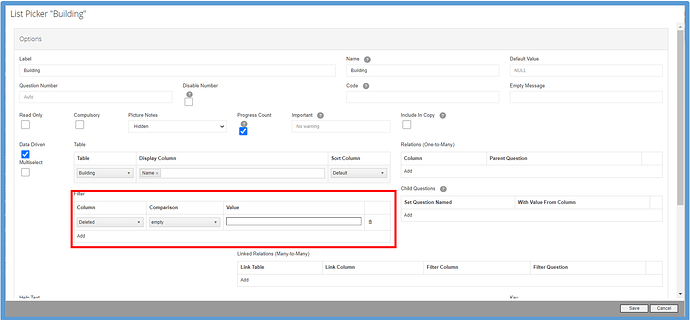
Within the editing menu, tick the “Data Driven” option in the Options menu.
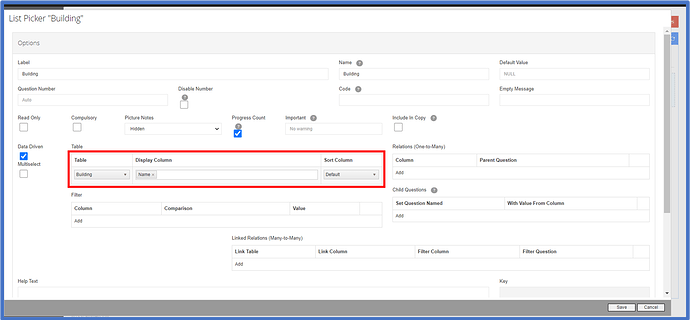
Once this is selected, the option to choose what values to display in the pick list becomes available. First, select a table to draw data from, then choose which column within the table to display. For this example, I will be displaying the names of buildings within the Building table.
To prevent deleted buildings from appearing in the list too, click Add under the Filter section. Set the column to “Deleted”, and the comparison to “empty”.
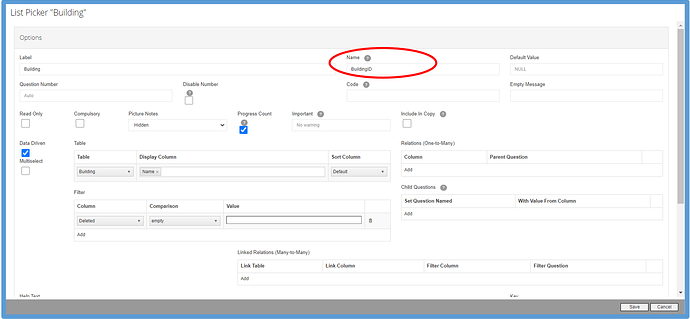
Next we need to give the picklist a name. This is not the name displayed within the app, but the variable name used in the back-end. For this example, we will call the picklist BuildingID.
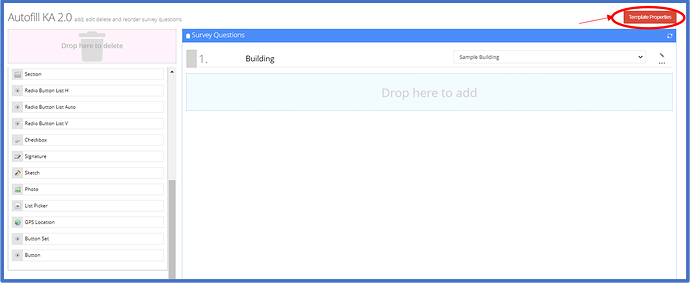
Remember/copy this name down, as you will need it for the next step. Save your changes, then navigate to Template Properties.
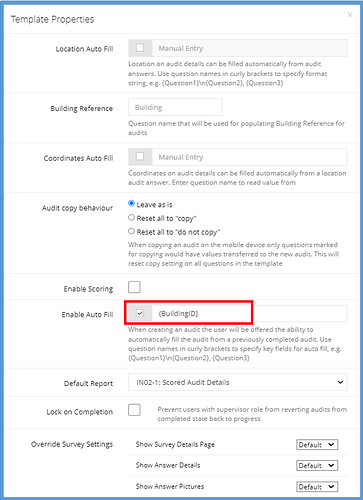
Within your template properties, tick the “Enable AutoFill” option, end enter your picklist name into the textbox to the right with curly brackets around it, then Save your changes at the bottom.
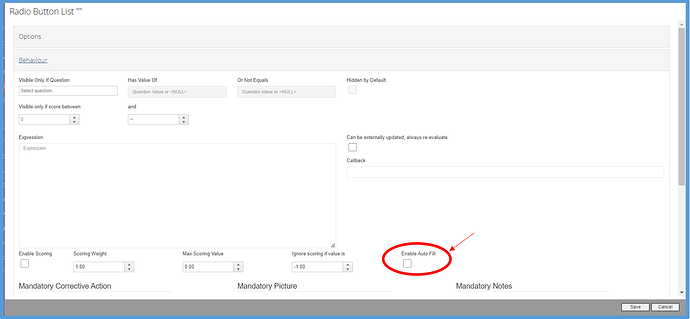
Next you need to select which questions you wish to be AutoFilled. On questions that need to be autofilled, enter the Edit menu, and tick “Enable AutoFill” within the Behaviours menu.
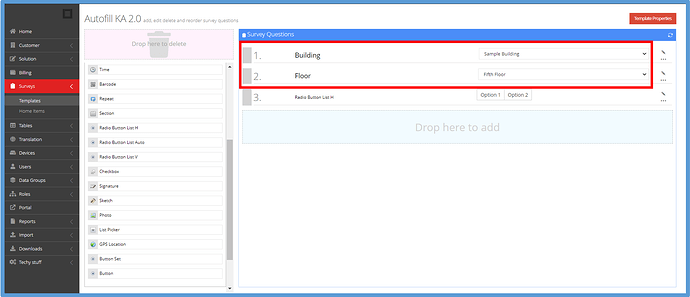
It is also possible to allow autofill on two conditions, for example building and floor. This can be achieved by adding an extra data-driven listpicker containing the second field you wish to configure the autofill options on. Instructions on how to do this can be found at the start of the knowledge article.
Within Template Properties, the second variable name needs to be included in curly brackets within the Enable Auto Fill textbox, with a comma separating the two. Please note that when the survey is completed, the group that will appear on the record, is the group of the second variable entered into the Enable Auto Fill textbox. In this example, the group of the Floor chosen would be the one that appears in the autofill record.
Once you are happy with your options, publish the survey.
Within the App
When selecting the building, project or area to perform the AutoFill action on, to prevent the upload of poor data to Mobiess servers, please ensure that the selected building/project is assigned to a data group. To learn how to edit and create new buildings/projects, please refer to KB-AI-00010.
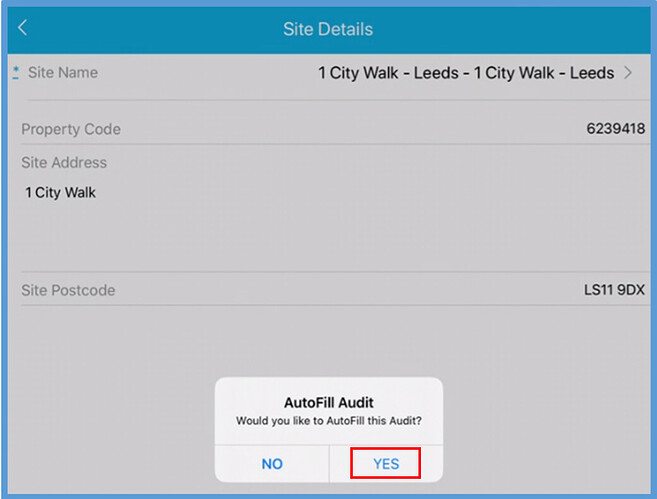
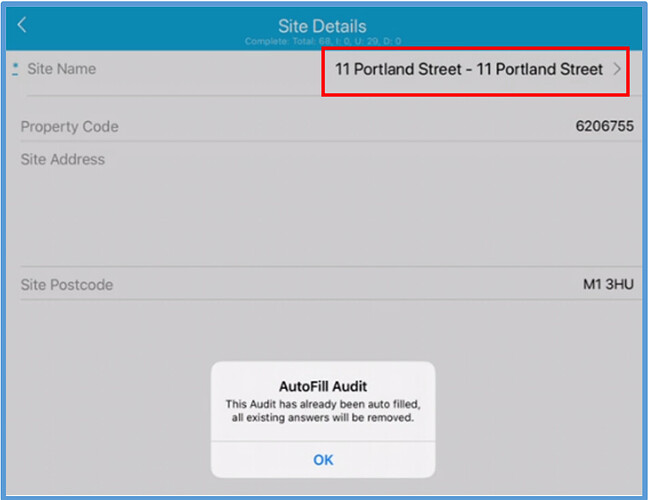
When selecting the key field, the AutoFill Audit prompt appears. If Yes is selected all the previously entered fields that were set to AutoFill will be populated.
If the key field is changed after using the AutoFill feature the audit will display a prompt and remove the AutoFilled fields.
